
Become a better gardener! Discover our new Almanac Garden Planner features for 2024. It’s easy, fun, and free to try!

If your plants don’t thrive, the answer is often in the soil. Healthy garden soil makes healthy plants that are less vulnerable to pests.
The good news? You can improve your soil! Here is a 3-step quick fix to healthy soil and a guide on soil health for those who wish to “dig deeper.”
The last thing we want to do is overwhelm the beginner gardener! If you do nothing else, here are three basic steps you can do before planting.
A tip: If you live in a colder region, consider a raised garden bed to help wet, cold soils dry out and warm up more quickly. Also, cover your beds before planting with black plastic to cardboard to block light and protect them from snow, rain, and erosion. Read more about warming up the spring soil.
A tip: If you have a very weedy garden and are just getting started, cover the soil in late winter with clear plastic (“solarization”). Once the weed seedlings are up, pull them out or remove them with a hoe. Don’t dig up the soil, which will just bring new weed seeds to the surface—the idea is to remove those already at the top. Once you build a rich, dark, fertile soil foundation, gardening will be “easier” the rest of the year and going forward!
Do you have clay or sandy soil? Is your soil acidic or alkaline? Is it thin or rich in nutrients? If you really want to improve your gardening success overall, take time to understand the type of soil in your own yard. Determining the makeup of your soil composition is important because you’ll understand if you need to tweak anything. Having good soil is critical in your success as a gardener and will end up making gardening so much easier.
We’ll touch on three important components:
There are three types of soil: clay soil, sandy soil, and silt.
The ideal soil texture is “loamy” and consists of equal parts of sand, silt, and clay. Loamy soil has that perfect balance—it holds moisture but also drains well, allows oxygen to reach plants’ roots, and is rich in humus (organic matter). It’s fertile, easy to work, and contains plenty of organic matter.
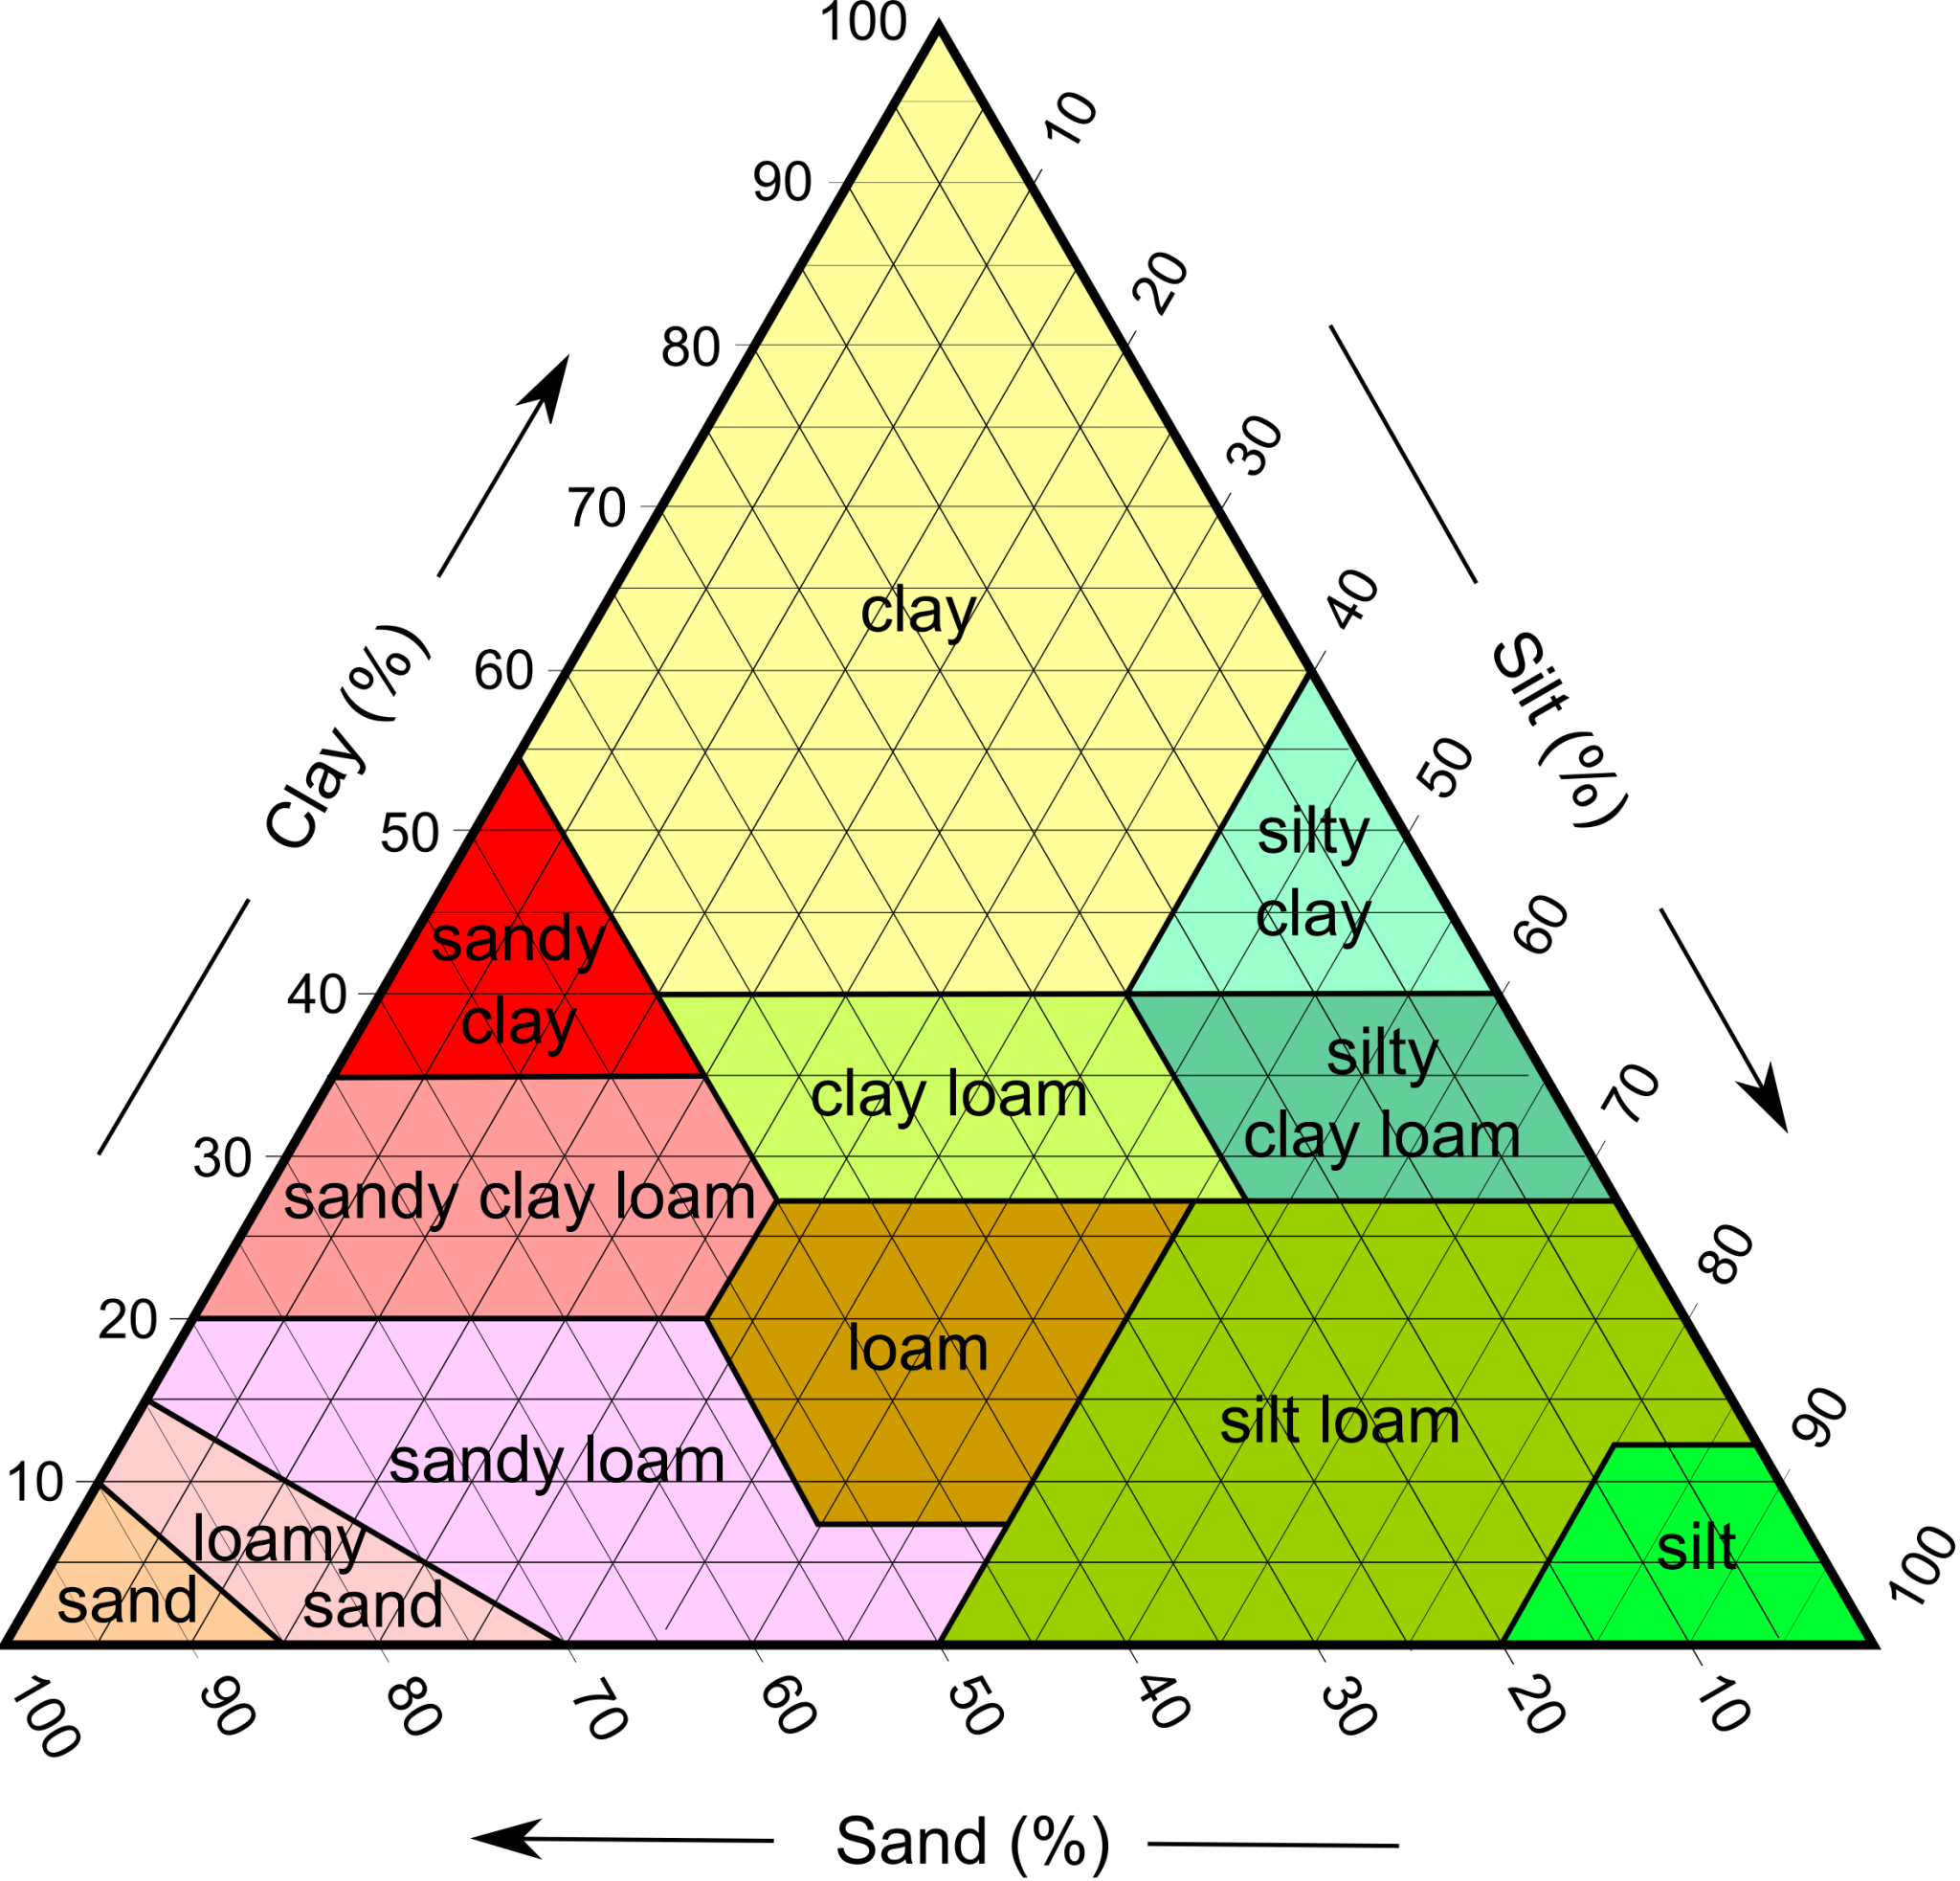
Loamy Soil (the Goal)
The soil is damp but not sticky, even after a rainfall. Good garden soil crumbles easily. It will not form a hard ball when squeezed nor crack or crust over when dry.
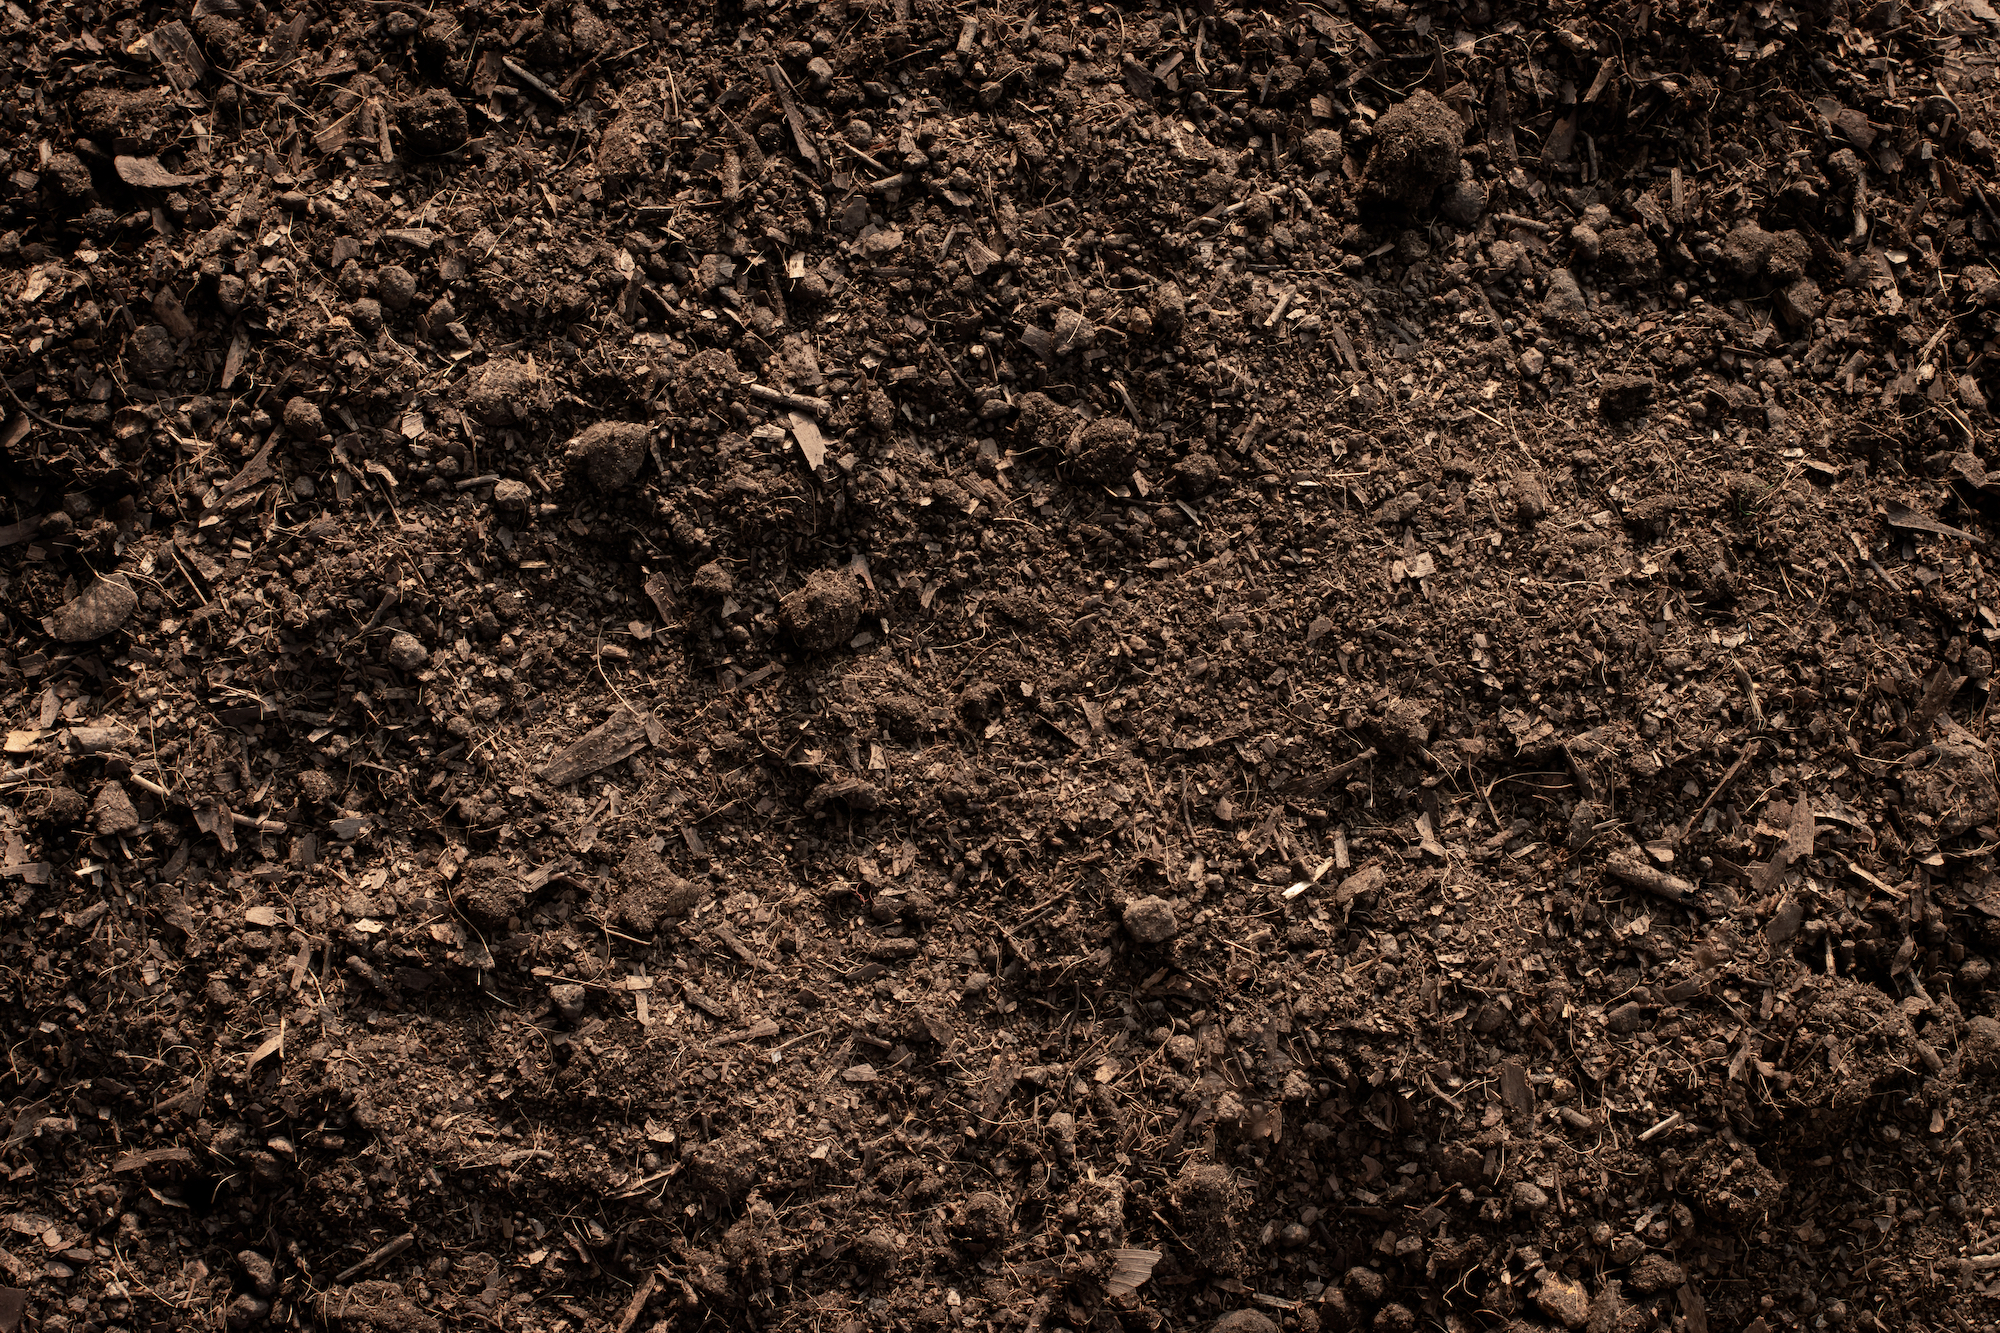
Clay Soil
With very fine particles, clay soil will feel wet and sticky. Clay soil will easily hold its shape when rolled into a ball. It has poor drainage and poor aeration. It’s often fertile, but the nutrients get locked up. When it dries in the hot summer sun, clay soil cracks; it also gets waterlogged in winter. Clay soil needs lots of organic matter and loft to break up the sticky, dense texture, including compost and well-aged manure.

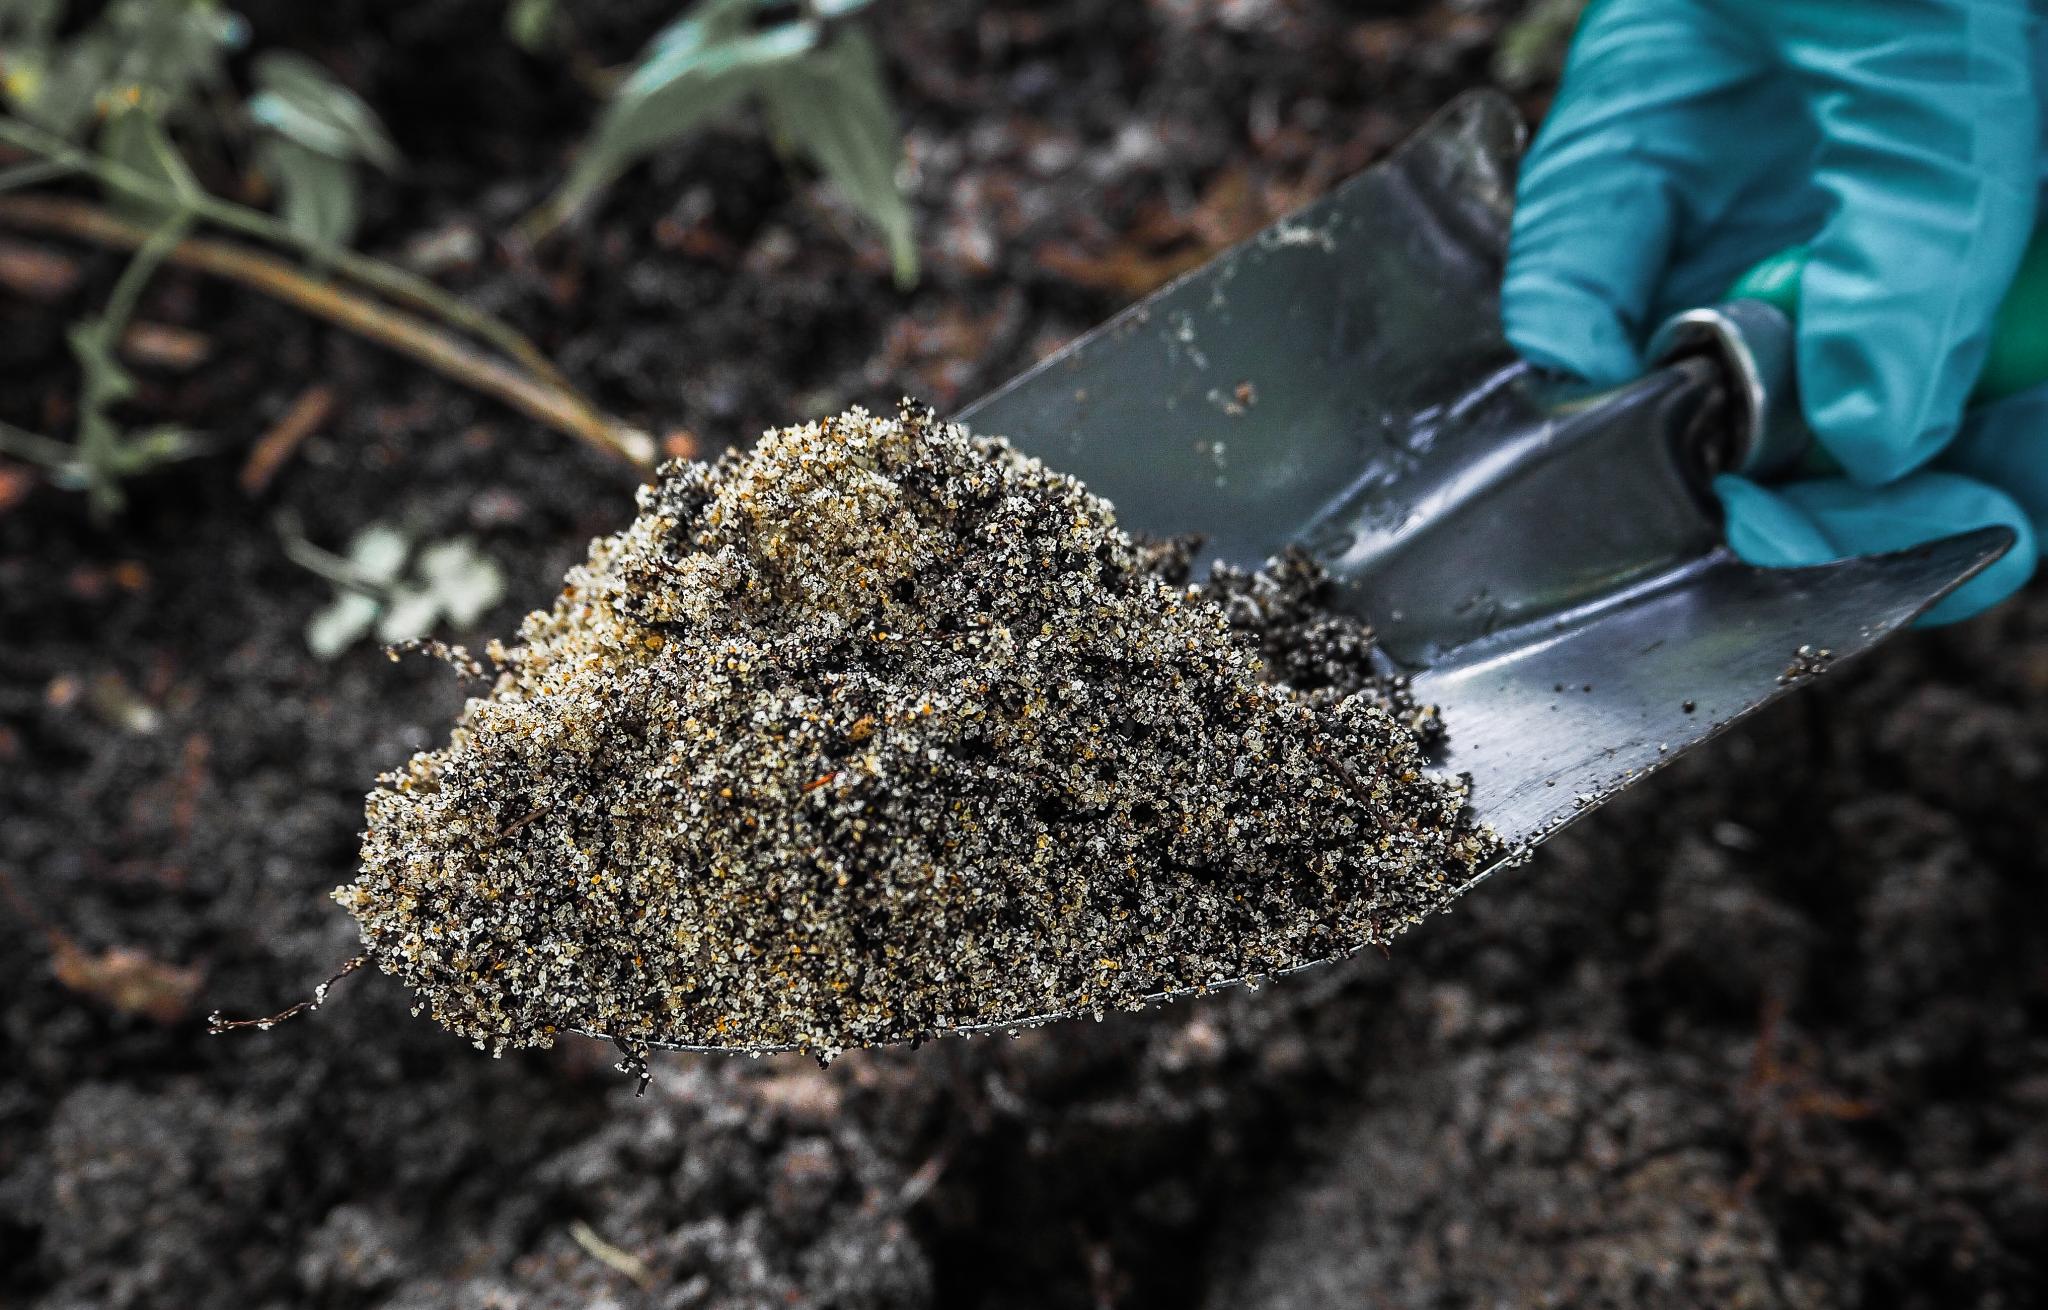
Sandy Soil
With its large particles, sandy soil feels gritty. It’s a loose and crumbly soil and won’t stay in a ball. Sandy soil drains very quickly and leaches nutrients, so it is not very fertile. You’ll need to amend with compost and well-aged manure.
To better discern your soil type, you can have it tested. Many universities have affiliated Cooperative Extension services, which will often test your garden soil for a small fee.
Or you can also conduct a DIY jar test to determine your soil type. Get a glass mason jar and put a couple of inches of soil in the jar. Do this with several jars, taking samples from around the garden. Then simply fill the jars with water. Here are the complete instructions for the jar test and other DIY soil tests.
A soil test will also tell you more about the fertility of your soil. Without fertile soil, it’s almost impossible to grow a vegetable garden. Plants’ primary nutrients are nitrogen (N), phosphorus (P), and potassium (K). On the package of fertilizer, you’ll see these three values separated by dashes (N-P-K); the numbers of each nutrient indicate the percentage of net weight contained.
A soil test will tell you what nutrients your soil is missing. You do not want to add nutrients to your soil if they’re already available in high amounts; this may actually inhibit your plants’ growth.
For example, a soil test may tell you that your soil needs more potassium but absolutely no additional phosphorus. You’ll also learn about some other essential nutrients, including magnesium and calcium.
Soil pH is the third and last component of healthy soil and affects the availability of nutrients and minerals in the soil, as well as how well a plant can access, absorb, and regulate these materials. A very high or very low soil pH will result in nutrient deficiency or toxicity, leading to poor plant growth.
A pH ranging from 6.0 to 7.0 is ideal for most garden vegetables. This is the ideal range when microbial activity is greatest, and plant roots can best access nutrients. However, many plants tolerate a wide range, and certain plants have specific pH range preferences. Find a list of common garden plants and their pH preferences here.
Availability of Nutrients at Varying pH Values
Through a soil test, perhaps you find out that your soil is too acidic (which is great for blueberries and azaleas, but not cabbage). Your soil test results will make recommendations to adjust your soil pH. If your soil pH is too low (acidic), add garden lime to the bed. If your soil pH is too high (alkaline), add powdered sulfur to the soil.
Raising and lowering your pH does take time; once lime or sulfur is applied, it can take a year or more to see any movement in pH. Remember, you do not have to change your soil pH if you grow plants that tolerate the current pH of your soil. And never assume that you should add lime, sulfur, wood ash, or other amendments. Don’t make already alkaline soil even more alkaline with wood ash!
As discussed above, the best way to make poor soil into perfect soil is to add nutrient-rich organic matter such as compost, aged manure, or leaf mold.
The benefits of organic matter are countless! Adding organic matter…
Here are some of the most common amendments and their functions:
Adding organic materials in the fall allows time for them to decompose and break down over the winter. Soil high in organic matter releases a reservoir of nutrients that are slowly released over time, which improves root growth and biological activity.
If you didn’t get to this job in the fall, amend it in the spring as soon as the soil is workable.
How do you know when the soil is workable?
Take a handful of soil from a depth of about 6 inches and squeeze it in your hand to form a ball. If the soil crumbles through your fingers, then it is dry enough to work. If the soil forms a ball that falls apart on its own or when you press it with your thumb, then the soil is dry enough to work. However, if the ball retains its shape or your thumb just leaves an indentation, the soil is too wet to work. Wait a few days and check the soil again.
To add organic matter:
Remember, before adding any amendments, it’s a good idea to get a soil test done! Here’s how to tackle each type of soil:
Too Much of a Good Thing
As with anything, adding too much organic matter can be detrimental! Too much organic matter can rapidly increase microorganism activity, which uses up available nitrogen and affects soil pH. Aim to have organic matter make up about 1/4 of your soil mixture overall, and thoroughly mix it into your existing soil.
If you’re struggling with your soil, another option is raised garden beds. With raised beds, you control the soil that you put in the bed. Whether you decide to plant directly in the ground or in a raised bed, make sure that you don’t walk on your newly amended soil, or it will get compacted. The general rule is to make sure a bed is no wider than four feet—or has a garden path—so that you don’t walk on the soil. See how to build a raised bed.
Raised beds also help in colder climates to advance your growing season by a couple of weeks. Speed things along by covering the beds with something light-blocking and non-porous, like black plastic anchored down with rocks. If you’re not keen on plastic, you could lay old salvaged windows over the bed. At a minimum, we like to cover our beds with cardboard or old carpet remnants to keep weeds from growing.
Do you have an over-spent or neglected field you want to turn into a garden? Read our article about reclaiming your garden soil.